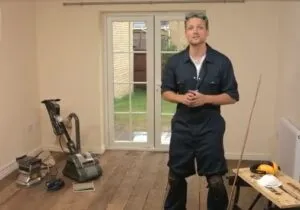
How to Sand a wooden floor
Sanding a wooden floor is a rewarding DIY project to undertake. The job is easier than you may think, and will give your wooden floor a new lease on life. Hire it (Natal) has been hiring construction equipment for over 30 years, and we are often asked how to go about sanding a wooden floor. Following we have laid out some basic steps, tips and tried to answer the most commonly asked questions.

- Preparation
- After completely emptying your room, remove any old floor coverings, nails and anything else that is attached to the floor and then give everything a good vacuum and sweep clean. Use a Nail punch to hammer in any nails that are protruding above the surface, as these will tear the paper, and can damage the machine. Basically, you want an empty, dust free surface to start working from. The big drum floor sander that you ll be using is really bulky and you really need space to move around the room easily.
- Tools you’ll need include a drum or floor sander and an edging or belt sander. Hire it can give you what you need and show you how to use the machines. Additional tools: hammer, nail punch, sandpaper, and vacuum cleaner.
- Protection gear – dust masks, ear protection, sensible shoe.
2. Sanding
- If you have really, really uneven floorboards, you could start by sanding (with the large drum sander) diagonally to the floorboards to even things out and then move on to sanding in the direction of the boards. As a general rule, you always sand with the grain of the wood. You will have to sand around the edges of the room with the edging sander and sand the rest of the floor with the large drum sander.
- Sandpaper grits range from roughest to smoothest, which are typically; 24 grit, 40 grit, 80 grit and 100 grit. If the wood surface is very uneven, start sanding the floor with the really coarse 24 grit sandpaper at an angle across the grain. If the wood is in a decent condition, you can start with 40 grit paper. After removing most of the old layers of varnish, stain and grime, you can move on the less coarse paper. The really coarse paper will really eat into the floorboards and leave a very rough surface. With each sand with finer paper, you are removing and smoothing out the roughness of the wood. Don t skip the really fine paper either. It really does make your floor much smoother, more professional and easier to maintain.
- Switch your sandpaper regularly, the more frequently you switch the paper, the faster you ll be able to sand the floors. Don t underestimate the amount of paper you will need, either. When hiring the machine you buy the paper, but you can return any surplus. You don t want to run out of paper, especially if you re working at the weekend and can t get hold of more. For the large drum sander, the rough guideline is that 1 sheet of paper will sand 4 square meters. The finer grit sheets will sand a slightly larger surface area than the rougher grit.
3. Varnishing
- Start by making sure you ve removed all dirt and dust from sanding before varnishing. A 75mm brush works well for an average sized room, although you can use a roller brush. When applying the varnish, always make sure that you apply your brush strokes in the direction of the wood grain. That s pretty much it.
- We d recommend using a stain and then a clear varnish on top. We ve seen a few floors where a coloured varnish has been used which over time inevitably wears away and gets the odd chip and scratch. As the colour chips away, any marks are then really visible. If you stain and then varnish the floor, for the most part only the varnish will wear away leaving any chips less visible.
- Your floor is essentially unprotected after sanding. You should aim to get it varnished (or oiled) as soon as possible. The manufacturer s guidelines will vary, but as a rough guide around 3 coats for normal traffic areas and an extra fourth coat for high traffic hallways like hallways is what you should be aiming for. You shouldn t move your furniture back till the varnished is entirely cured, which (depending on your varnish) can take up to 14 days! In most cases this obviously isn t possible and we only waited about 48 hours for most of our furniture.
4. Timescales
- Don t underestimate the amount of time it will take to sand your floor. The professional floor sander guy took around 2-3 hours to sand our living room floor €“ it took us a lot longer! In numbers, it took the two of us about 25 hours to sand 4 rooms (totalling at about 43m ²). If you had just one room the same size, it probably wouldn t take as long, as you d have fewer edges and less manoeuvring to do.
- Varnishing the floor was surprisingly quick. I d say it didn t take us much longer than an hour to varnish all rooms once.
5. Cost
- Hire it (Natal) hires floor sanders for R400 per day incl VAT weekdays, and R600 incl VAT over the weekend. The sanding paper price varies per sheet, depending on the Grit, but the max price is R25 per sheet. You will only be charged for the paper that you take, so better to take more than less.
- The Belt sander for the edging costs R150 per day incl Vat, and R225 for a weekend. The sanding belts will cost a max of R25 per sheet.
CALL TODAY us to hire your floor sander on (031) 764 2525
CLICK HERE for video


